Saturday, November 15, 2014

Eggless Wholewheat Pancakes

Happy weekend, everyone!
So for today's breakfast, I decided to try taking eggs out of my pancakes, just for the sake of cutting down the cholestrol and calorie intake a little, (and maybe eat that egg seperately, just saying). The result was better than I imagined.
This is a very easy recipe, simple enough to follow without looking back at your phone/ipad/tablet to double-check its ingredients/procedures every 2 minutes. They're super fluffy and just sweet enough for them not to be too sweet nor too non-sweet, if you know what I mean.

Here it goes.

Ingredients:

1. 1 cup wholewheat flour
2. 1 Tbs sugar substitute
3. 1 Tbs baking powder
4. 1 cup skimmed milk
5. 1 Tbs oil
6. 3 Tbs water
7. 1 tsp cinnamon (optional)

Procedures:

● Mix all the dry ingredients (flour, sugar, baking powder, cinnamon) in a small bowl.
● Whisk wet ingredients together, then add them to the dry ones and use a spatula to mix everything well.
● Scarcely oil (or use cooking spray on) a non-stick pan, and use a 1/4 measuring cup to unify the size of your pancakies.
● Flip your pancake when bubbles start forming on the surface.
● Yields about 5-6 small pancakes.
● Serve with fruit, yogurt, applesauce, or melted dark chocolate for a healthy breakfast, snack or dessert.

Please leave me a note if you try it.

xoxoxo

Friday, August 29, 2014

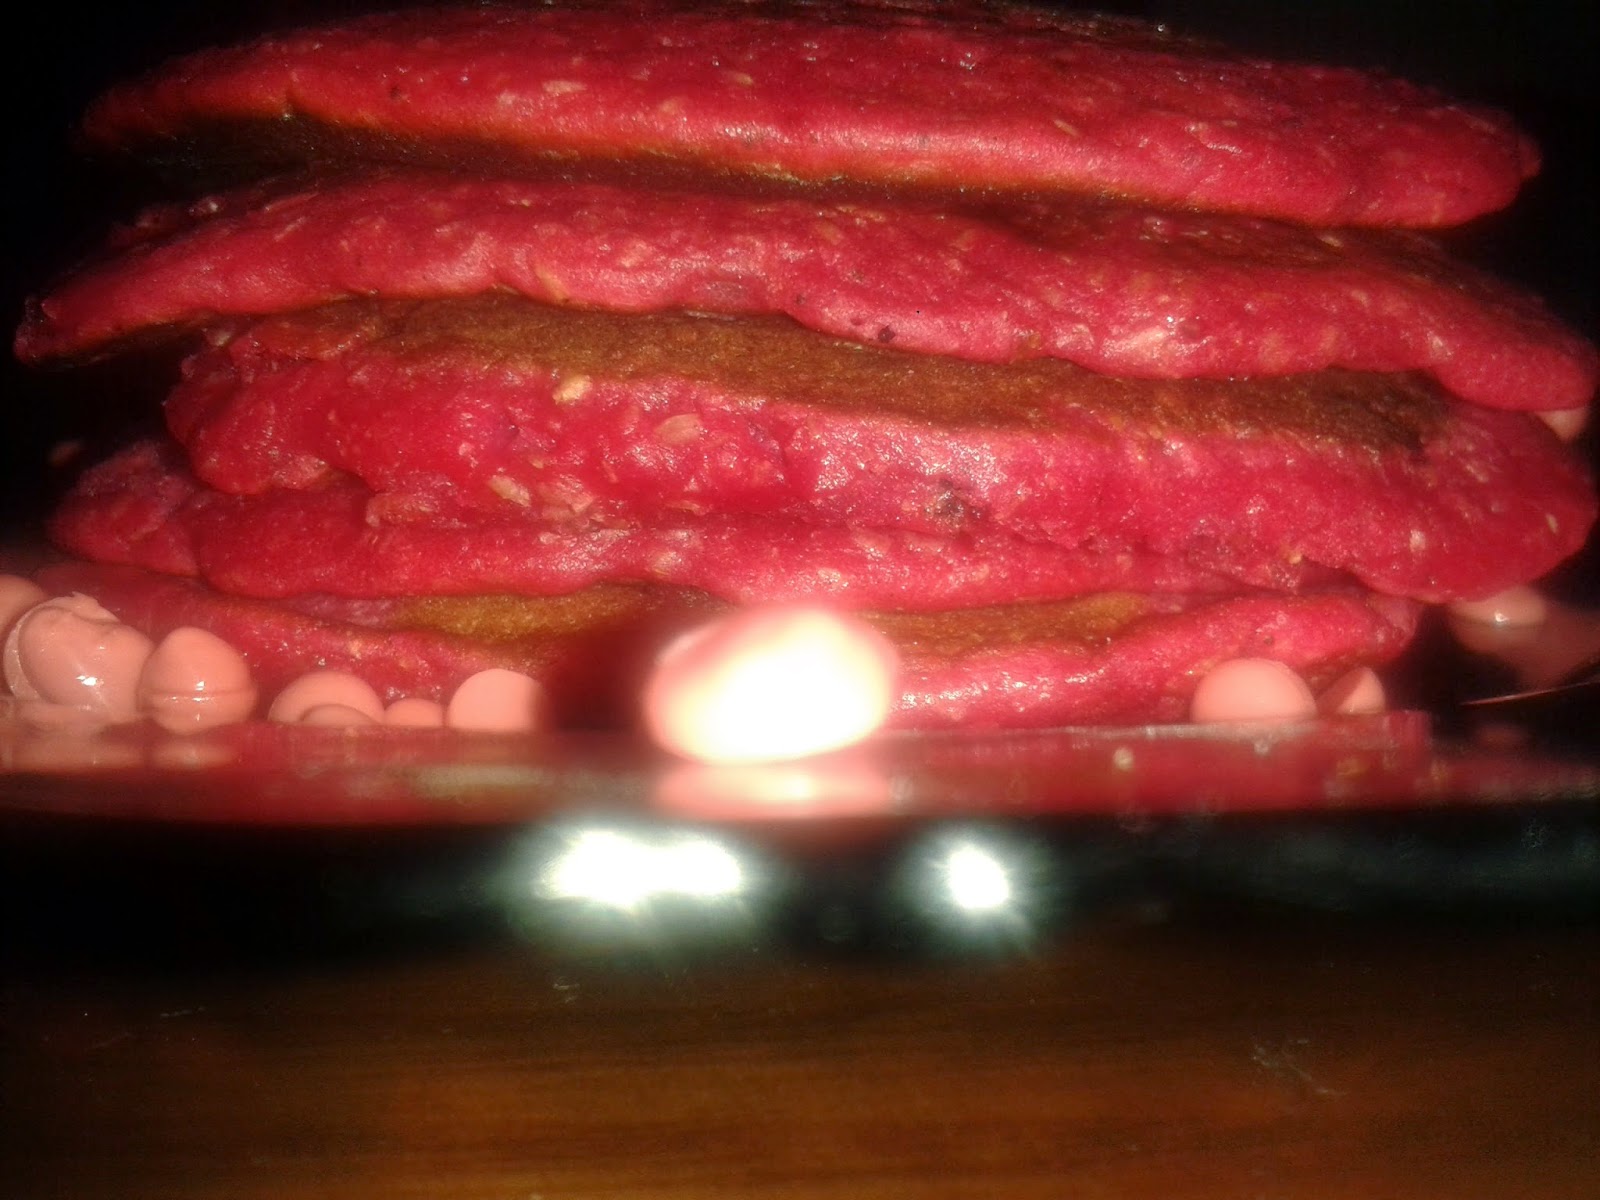
Healthy Red Velvet Wholewheat Pancakes

The weekend is the perfect excuse to have pancakes for breakfast. They are a little celebratory and essy to make, so what's not to like? 
I wanted to add a little twist to this weekend's pancakes, so I thought of adding some red food colouring for a sexy effect. Heck, it did work!
This recipe is a staple in my house, and I like to play around with it every now and then. You can get really creative with its add-ons and decorations.

As usual, excuse the crappy photo.
I sprinkled some strawberry chocolate chips on top, just for the sake of the pic, and Lily ate them as soon as the flash went off!


This recipe yields 4 - 5 small pancakes. You can, of course, double the ingredients to get double the number of pancakes.

Here's what you'll need:

- 1 cup wholewheat flour

- 2 tsp sweetener/honey

- 1/2 tsp baking powder

- 1/4 tsp baking soda

- 1/2 tsp vanilla

- 1/2 tsp cinnamon  (or more)

- 1 egg

- 1 cup milk

- 1 tbs apple cider vinegar

- 2 tbs oil (coconut is lovely here)

- 1/4 red food colouring (or until you get a vibrant red-coloured batter)

- Optional: Raisins/fruit pieces/nuts

Procedures:

1-In a small bowl, combine milk and vinegar, set aside until milk curdles.

2- In another bowl, combine flour, sweetener, baking powder and soda and cinnamon.

3- In a small bowl, whisk the egg, vanilla, oil and curdled milk until well-incorporated.

4- Gradually pour the liquid mix onto the dry mix while whisking slowly.

5- Add your food colouring in small amounts and whisk after every addition until you reach that red velvet colour. Don't over-mix or the pancakes would be tough. The batter should be a little lumpy and bubbly.

6- You can now add whatever you'd like, i.e. raisins/fruit/nuts/dark chocolate chips

7- Lightly brush a nonstick pan/griddle with coconut oil. Heat it over medium heat.

8- Ladle the batter and pour into the pan. I like to keep my pancakes small and even by using a 1/3 measuring cup as a ladle. 

9- They are ready to be flipped oncy tiny bubbles form on the surface.

10- Makes about 4-5 pancakes.

Sunday, August 24, 2014

Cheat Dessert: Zebra Cake

Hello lovelies,

Well, it's been a while since I last posted something on the blog. I've been bad! Work and housework combined are not really my cuppa tea. Anyway, I chose something fun, though not very "fit", as a comeback; Zebra Cake. There's nothing special about it except that it has a zebra pattern all through, which makes it pretty self-decorated. It's very impressive and looks like a ton of work. It is kind of a hassle, but very basic and needs absolutely zero skills. I assure you it would be a lovely crowd-pleaser and you'll be asked to do it on birthdays.
I first saw Lorraine Pascale do it, and was blown away. It took me a long time to pluck up the courage and do it, but it was definitely worth it. If you're on a healthy lifestyle like me, it would be a nice monthly or fortnightly treat , if you've got a lot of people around to finish it for you. I repeat, do NOT have your cake and eat it too, by yourself!


I used sugar substitute instead of sugar, but you can definitely use regular sugar. I use IsoSweet, which is an Egyptian fructose aspartame-free sugar substitute. It has two kinds; one for drinks and cold desserts, and another for baking. I used the baking kind here. You can definitely use any equivalent of choice, just make sure it's aspartame-free.
I also used unsweetened cocoa in the recipe, but you're free to use the sweetened kind if you wish, or just increase some sugar.

You'll need:

-2 cups sifted flour
-3 heaping tbs cocoa powder (I used raw unsweetened cocoa)
-1 cup sugar substitute/sugar
-4 eggs
-1/2 cup oil (I used heated coconut oil)
-1/2 cup milk (skimmed)
-1 vanilla sachet (1 tsp vanilla extract)
-1 baking powder sachet (15-16 g)
-1/4 tsp salt


Directions:
- Preheat oven to 180 degrees Celsius.
- Using an electric mixer or food processor, beat the eggs with the sugar until sugar is almost dissolved completely.
-Add oil, and continue beating.
- Add milk and salt and continue beating until frothy and pale yellow.
- Take 3 tbs off the four and set aside. Now your 2 cups flour are minus 3 tablespoons.
- Start adding the flour gradually and mixing till all is incorporated in the batter with no visible white streaks.
- Add the baking powder last and mix in using a wooden spoon or a spatula, not the mixer/food processor.
- Now divide the batter into 2 equal parts in two separate bowls. On one half, add the 3 tablespoons of cocoa and mix in with a spatula till well-incorporated in batter.
- On the "white" half, add in the 3 tbs of flour that you set aside. Mix in with a spatula.
- Your cake batters are ready.
- Prepare a 20-cm baking pan by lightly brushing with coconut oil/cooking spray/margarine then lightly sprinkling flour to coat it all, and finally getting rid of excess flour.
- In the center of the pan, carefully add 2 spoonfuls of white batter, then in the center of the white spoonfuls, add 2 spoonfuls of brown batter.
- Keep alternating between the white and the brown batters, 2 spoonfuls of each a time in the center of its previous "blob" till the batter is all done.
- Bake for 20 - 30 minutes until a toothpick comes out clean.
- Leave to cool completely before cutting.


My camera was dead, so I only took this terrible pic with my phone. Sorry! I promise it looked much better than this.


Tuesday, February 18, 2014

Valentine's Day Breakfast

Hi again everyone,

I hope you had the most romantic Valentine's Day ever, even if it was just a nice moment with a loved one, family, or friends.

If you haven't seen my last post, I put up this menu that I so bravely said I'd do on Val's, but I ended up skipping a couple of items due to running out of time.

Here's what I actually did:

Breakfast:

- Eggs in heart baskets


A cliche, but such a cute one! Super easy and looks like you've  done a little magic to put it together.

First of all, you'll need to separate the egg yolks and whites. I did two at a time, so I used 4 bowls to separate 2 eggs to make sure no accidents happen.

I used whole-grain toast for this one, but you're free to use whichever bread you fancy.
(Very) lightly butter 2 slices, and put over medium heat in a non-stick skillet. Once golden brown, take both slices off the skillet, butter the uncooked side of each, then use a heart-shaped cookie cutter to cut a heart out of each. Put both back in skillet with the cut-out hearts, cooked side up. You're now ready to add the eggs.

The key to getting picture-perfect results is to add a little bit of whites first, wait for a few second for it to harden, then add the egg yolk. You can add your seasoning at this point. I used salt, pepper and oregano.
Cover the skillet to help eggs set faster.  Serve immediately.


- Mini heart-shaped sandwiches with pink cheese frosting.


I basically used a heart-shaped cookie cutter, one size smaller than the one used above, to cut hearts out of whole-grain toast, and made light cheddar and salami sandwiches.

To decorate them,I used a plastic icing pipe/syringe (more fool-proof than piping bags) to draw a heart on each sandwich using my pink cheese frosting (light feta cheese mixed with beetroot powder) and a star tip for the icing pipe.


- I-Love-you Breakfast Parfait


 This was the easiest and most beautiful little breakfast dessert.

All you need is:
- 6 strawberries
- 2 low-fat vanilla (or regular yogurt)
- 2 low-fat strawberry yogurt
- 4 light digestive biscuits

1. Chop 5 strawberries, and slice the 6th for garnish.
2. Crumble the biscuits into larger crumbs. Set 2 dashes aside for garnish.
3. Your'e now ready to assemble your parfaits. Start by adding a layer of chopped strawberries, followed by vanilla yogurt, then more strawberries, followed by biscuits, and the last layer would be the strawberry yogurt.
4. Garnish with strawberry slices and biscuit crumbs. Cinnamon would be a nice addition too.
5. To make heart-shaped strawberry slices, cut a tiny triangle off the top of the strawberry, then slice it as you would normally slice a strawberry. Voila!

You'll need To finish it off, I wrote "I Love You xoxoxo" using a permanent marker on the glass for a personalized touch.

Wednesday, February 12, 2014

Valentine's Day Special

It's been almost a month since I last posted, and it makes me feel horrible. So much has happened since then; my sister's birthday, getting a job as a 5th grade teacher at a reputable school and finally, Lily catching the Rubella virus (German Measles). Talk about busy!

So anyway, I decided to take a break from all the tension (and my terrible flu) and blog about my culinary plans for Valentine's.
As always, I raided Pinterest, Facebook and the whole wide web for ideas and recipes, healthy ones.
I reached the conclusion that, you know what, I don't have to be super healthy on that day. I mean, if I won't splurge on Val's, when would I? (except for my birthday, and any other family birthday, of course!)

Here are my preliminary plans that can change by tomorrow:

Breakfast:

- Eggs in heart baskets
- Mini heart-shaped sandwiches with pink cheese frosting.
- I Love You Breakfast Parfaits

Lunch (This is our main meal of the day, similar to dinner in the US) :

- Tomato Soup
- Lettuce and croutons salad
- Chicken Cordon Bleu
- Penne Green Patitsio

Dessert:

- Pink Velvet Cinnamon Rolls

Dinner: (That's our evening/night meal, similar to supper in the US)

- Mini Pizza Hearts

Recipes to follow. :)


Saturday, January 18, 2014

Sugar-free Strawberry Jam

Let me tell you something about me; I adore strawberries. And ever since I've started my lifestyle change, I've been using it as an excuse to eat even more of those sexy hot-red beauties.
I recently came across a jam recipe on Instagram which uses no added sugar and chia seeds. I wasn't lucky enough in my pursuit of chia here in Alexandria, so a good friend of mine suggested flax seeds instead. Bottom line, this is NOT my own recipe, but one I had to try. So here's the simple recipe to a healthy strawberry jam. You can use any kind of berries too, and ,of course, you can replace flax with chia seeds.
Jam away!

Recipe yields about 1/2 cup of jam, so feel free to double ingredients for more quantity. I used 1 tsp of honey because I like my jam tangy, but you can add 1 more if you prefer it sweeter.

Ingredients:
• 1 cup strawberries
• 1 tsp honey/agave/natural maple syrup
• 1 1/2 tsp flax seeds

Directions:
1. Using a food processor, break down the strawberries for 5 seconds on medium speed, just to help them cook faster, but not so mych to reach purée consistency.
2. Into a skillet over medium heat, transfer strawberries and bring to a simmer.
3. Add honey and stir, and bring the
heat down to low.
4. Add flax seeds, stir and leave ro cook for 5 minutes. It should reach the jam consistency with the help of the seeds.
5. Remove it off the heat, leave to cool, and store in a clean air-tight jar for as long as a week in the fridge.
6. Enjoy! :)

Tuesday, January 14, 2014

Healthy Cookie-dough Lemon Bars

Have you tried lemon desserts yet? If not, start with this healthy lemon bars recipe. It's light, tangy, non-sickeningly sweet like most lemon desserts and is such a guiltless pleasure. I know chocolate is the main go-to dessert for everyone, but it sometimes calls for non-chocolate ones. As I'm not really a cream-dessert kinda gal, I'm more inclined to fruity treats. They are generally a bit lighter than normal desserts, taking most of their sweetness and flavor from all-natural fruits. I've made a Weight Watchers lemon bars recipe before,which I didn't really like, so I decided to pursue my own.
Here is my humble attempt at healthy lemon bars, with a fiber-full crust and a rich lemony topping.
Note: I didn't sprinkle my lemon cubes in the below picture with sugar/coconut. The white surface is just the light froth from beating the lemon.


Ingredients:

Crust:

1/2 cup whole wheat flour
1/4 cup bran
1/2 tsp baking soda
1/2 tsp baking powder
1 egg
1 tsp vanilla
1/4 cup oil
1/4 cup sugar


Lemon Topping:

4 eggs
4 tbsp. honey
2 tbsp. sugar substitute (I use Z Sweet)1/3 cup fresh lemon juice (about 2 lemons)
1 tablespoon cornstarch
1/2 teaspoon baking powder
1 tablespoon lemon zest, grated
Powdered sugar for topping, or shredded coconut (optional)

Directions:


  1. Preheat oven to 180 degree Celsius.
  2. Prepare a small baking dish with cooking spray, or 2 overlapping parchment papers for easy removal from the dish.
  3. Mix dry ingredients of the crust together. 
  4. In a separate bowl, whisk sugar, egg and oil until well combined. 
  5. Add dry mix to wet mix and mix until everything is incorporated in the dough.
  6. Press the dough into baking dish and bake until golden brown, about 15 minutes.
  7. While crust is baking, prepare lemon topping. Beat eggs in a medium bowl. Add sugar, honey, lemon juice, cornstarch, baking powder and lemon zest and stir until well mixed. 
  8. Pour egg mixture over baked crust. Return pan to oven and bake for 15 to 20 minutes (do not overbake)
  9. Cut into cubes while still warm. Sprinkle powdered sugar/ shredded coconut when cooled. Yields 24 cubes.
  10. Serve in room temperature or cold.


Saturday, January 11, 2014

Whole-wheat Cocoa, Bran and Flax Seed Cookies

If you're anything like me and you love your chocolate and chocolaty stuff but on an eat-clean mission for weightloss, fitness or health reasons, then you have definitely been going crazy trying to find good recipes or, even harder, products that fill the above criteria. Well, I hear you, guys, and I'm there. So I've been working on a recipe that would look, taste and be good enough, and I finally reached it. This one is high in fiber, so it's very good for your bowls too. (And here I am talking and worrying about others' bowl movements, again! I have a toddler, so this is always on my mind)
I used bran and flax seeds, but you can also use oatmeal instead of flax. You can also spice it up with semi-sweet chocolate chips or nuts/raisins for an added oomf. I chose to do the basic recipe here, but any further tweaking is up to your preferences.

You'll need:

1/2 cup whole-wheat flour
1 tbs bran
1 tbs any kind of white flour
1/4 cup raw cocoa powder
1 tbs flax seeds
1/2 tsp baking powder
1/2 tsp baking soda
1/3 cup brown/Stevia sugar
1 egg
1 tsp vanilla extract ( or 1 sachet) 1/4 cup canola/vegetable oil

Steps:

1. Preheat oven to 180º c. (350º f.) 2. Combine flours, baking powder, bran, baking soda and cocoa powder in a bowl.
3. In a seperate bowl, whisk sugar, egg, vanilla and oil till well-combined.
4. Gradually add dry mixture to wet mixture and whisk it (either by hand or food processor) until everything is well incorporated in the dough. Add flax seeds last.
5. Line a baking sheet/tray with parchment paper (or spray with cooking spray/lightly brush with oil) and divide dough into spoonfuls onto it. Yields about 24 small cookies.
6. Cook in preheated oven for 10 minutes. Leave to cool completely before serving.

Thursday, January 9, 2014

Turkey Vegetable Roast

Who doesn't like a good hearty roast dinner, especially in this cold weather?
I found some interesting turkey cuts at my local poultry shop, and decided to give cooking them a try. Turkey is a rich source of protien, and also of zinc, iron, potassium and phosphorus. It is also packed with vitamin B6 and niacin, which are both essential for the body energy production. Moreover, regular turkey cosumption can help lower cholestrol levels, and keep insulin levels stable. It is also rich in selenium which is essential for thyroid hormone metabolism. Finally, turkey meat boosts immunity and acts as an antioxidant.
But don't over stock on turkey just yet. Turkey meat can be high in sodium, so go easy with the salt on it. Its skin can be VERY high in fat, thus be sure to remove the skin and fat before cooking.

Source: www.bodyandsoul.com

Enough with the facts, now let's get cookin'.
This dish will blow your socks off with how easy and tasty it is. You should leave the turkey to marinade for at least 2 hours, but overnight would be perfect.

This's what you'll need:

• Around 500 g. of bone-in turkey thighs and/or breasts
• 8 broccoli florettes
• 2 cups frozen mixed vegetables, thawed

Marinade:
• 1 LF yogurt
• 1 tbs tomato concentrate
• 1 small onion, finely chopped
• 1 tbs garlic powder
• 2 tsp mustard
• 1/4 tsp each of ground pepper, paprika, all-spice, cinnamon, turmeric, rosemary, ginger and oregano
• 1/2 tsp salt (to taste)
• Juice of 1 small lemon
• 1 tsp honey

1. Rinse and dry turkey, then trim any excess skin. Give it a quick vinegar splash, then rinse with water.
2. In a deep bowl, mix all marinade ingredients very well, set 1/4 cup of that aside for the vegetables.
3. Using a knife, poke bone-deep "holes" in the turkey to help it absorb marinade faster
4. Put turkey in marinade and mix to coat every inch.
5. Cover with cling film and refrigerate for 2 hours at least.
6. After 1 and 1/2 hours, preheat oven to 200° c.
7. When time is up, get a non-stick baking dish (or a regular one covered with parchment paper) and put the turkey in the middle.
8. Mix the remaining marinade that was left aside with broccoli and veggies. Transfer to baking dish, spreading them around your turkey.
9. Cover with aluminium foil and bake in preheated oven for 50 min.
10. Serve with wholegrain rice, bread or just alone.

Wednesday, January 8, 2014

Skinny Chicken Shawerma Wraps

Most people love shawerma for its tasty convenience, but it's usually super greasy and heavy, with fat almost dripping off. Yuck!
Here's my healthy version of a family favorite.


You need:
• 4 Boneless, skinless, chicken breast fillets
• 2 medium tomatoes, chopped
• 2 bell peppers, chopped
• 1 small onion, roughly-chopped
• 1 spring onion, chopped
• 1 medium carrot, grated
• 1/4 cup LF buttermilk
• 1/2 tsp coconut/olive oil
• 1 and 1/2 tsp salt (to taste)
• 1/4 tsp each of ground pepper, cardamom, ginger, cinnamon, all-spice, sumac and shawerma seasoning.

P.S. I found the latter in the spice section of a local department store(Fathalla), but you can try any local spice shop/section. If unavailable, replace with 1/4 tsp each of turmeric, ground cumin & cayenne pepper.

Steps:
1. Slice chicken into thin strips, then cut the strips into small bits.
2. Brush a non-stick skillet with olive/coconut oil, then heat it over medium heat.
3. When oil is hot enough, put the chicken bits in, along with pepper, 1/2 tsp salt, cardamom, ginger and cinnamon.
4. Stir "fry" the chicken until cooked through, about 10 minutes.
5. Add onions, stir until translucent. Add carrots and spring onion. Cook vegetables till softened.
6. Add the rest of seasoning/spices; salt, all-spice, sumac and shawerma seasoning/ spice blend, and mix well.
7. Pour the buttermilk in, cover  and leave to simmer on low heat for about 10 minutes. 
8. Serve hot in wholegrain flat bread (Brown Lebanese bread), with tahini/yogurt sauce and your desired salad. I served mine with beetroot tahini sauce and carrot-cucumber salad. 

Tuesday, January 7, 2014

Pink Savory Frosting

So I've recently discovered the wonders of beetroot powder in making everything pretty (except my pajamas) . So I mixed it with my low-fat feta cheese and it tasted DIVINE! I was bored one night and needed to eat something that looked nice, so I made this mini 3-tier square "cake" with wholegrain bread slices, LF fat feta and tomato slices between layers, and topped it with my beet-feta frosting. It looked and tasted super gorgeous. I can think of lots of Valentine's Day breakfast ideas with that pink beauty.
So try adding beetroot powder to your cheese, and you won't regret it.

Beet it! :D

Monday, January 6, 2014

Chicken and Vegetables Pie

This is definitely my all-time favorite savory pie, and everyone in my family loves it to bits. You just HAVE to try it! :) 


Crust:
-3 cups (wholemeal) flour
-2 tbs sugar/Stevia
-2 sachets instant yeast powder
-4 tbs skimmed milk powder
-1 and 1/2 tsp baking powder
-1 and 1/2 tsp salt
-1/4 tsp each of oregano, cilantro, paprika, ginger
-1 egg
-1/4 cup oil
-Water as needed to form a non-sticky dough (around 1/2 cup)

Filling:
- Chicken breast fillets, around 5 pieces, or your desired amount, minced.
- 1 medium onion, sliced into half-moons
- 2 garlic cloves, minced
- 1 medium tomato, chopped.
- 2 medium bell peppers of choice, chopped.
- 2 medium carrots, grated.
- 1/2 cup shredded cheddar cheese, or mozzarella.
- salt,pepper, ginger, all-spice, cardamom, sumac, paprika to taste.

Put all the dry ingredients of the crust in the food processor/ kitchen machine and give them a good spin to get the yeast well-combined with everything.

Add the egg, and beat, then add the oil, and mix it all well.

Start adding the water slowly while mixing, till the dough reaches a pizza dough-like consistency (non-sticky)

Transfer the dough to a floured surface and knead it well by hand, till there are no flour streaks and the consistency is firm enough to be shaped.

Lightly grease a bowl , move the dough in there, cover it with cling film or a towel, and leave it in a warm place till it has almost doubled in size, around 90 minutes.

Start preparing the filling. Lightly grease a skillet with olive oil and stir-fry the chicken with the salt.pepper and half of the spices until it's cooked through.

Add the onion, and sweat it till it's translucent, then add the garlic.

Add the carrots, bell peppers and tomatoes and the rest of the spices.

Let the filling cool while the dough is doubling in size.

After around 70 minutes, preheat the oven at 180 degrees. Prepare an 18 cm baking tray (preferably a spring form one) by lightly greasing it.

After 90 minutes, move the doubled dough onto a floured surface, and divide it into 3/4 and 1/4 sections.

Start with the 3/4 section, use a rolling pin to spread it into a round form, wider than the baking tray. Carefully move it to the tray, making sure the sides are covered with dough. Cut any excess dough and leave it on the side for decoration.

Add the filling into the dough-covered tray.
Spread the remaining section with the rolling pin into a round shape as well, and cover the filling with it, pinching the edges together to firmly close the pie up.

If you had any excess dough, roll them flat then use cookie cutters of desired shape to decorate the pie with. I made stars

Stick it in the oven for 25-35 minutes, depending on your oven. Let it rest for a few minutes before cutting.

Healthy Applesauce


Ingredients:

■ 5-6 medium apple of your fave kind,peeled and cored

■1 tsp lemon juice

■ 3 tsp honey

■ 1/2 tsp cinnamon

■2 tbs sugar substitute (optional, I didn't add these)

■3/4 cup water


◆Cut the apples into approx.1/8 inch slices, then cut each slice in half.

◆ Put the apples in saucepan, add honey,cinnamon and water.

◆Stir well to coat each slice, then turn the heat on and leave to cook with the lid on for 7 minutes on medium heat

◆ Turn heat down to medium-low and leave for 10 more minutes,uncovered, till apples are tender and water evaporates. Use a masher or a fork to mash the apple pieces to desired consistency

◆Serve warm or cold, alone or over yogurt with vanilla, brown toast, whole-grain pancakes or just about anything! Works as a great oil substitute in dessert baking. Perfect baby food.

Healthy Sweet Potato Blondies

Who doesn't like blondies, especially with a morning cup of coffee? Here's a healthy version that tastes divine, and your kids would gobble it up as well. 

You need:

2/3 cup sweet potato puree (peeled, boiled and mashed)
1/4 cup oil (or low-fat yogurt)
2 tbs Stevia/ honey
1/4 cup brown sugar (honey)
1/8 cup skimmed milk/ soy milk
Vanilla
1/2 cup wholemeal flour
1/8 tsp baking powder
a dash of salt
1/2 tsp cinnamon powder
1/2 tsp ginger powder
Optional: nuts/chocolate chips

- Preheat oven to 350 f/180 c
- Prepare a small baking pan/sheet with enough parchment/baking paper to cover the sides, then lightly brush it with coconut oil/cooking spray
- Mix the sweet potato puree with oil/yogurt, milk, sugar/honey and vanilla.
- In another bowl, mix flour, salt, baking powder, cinnamon and ginger.
- Gradually add the dry mix to the liquid mix. Add nuts/chocolate chips if desired.
-Pour the mixture into baking sheet/pan, and flatten the surface with an offset spatula/knife/back of a spoon.
- Pop it into preheated oven for 25-30 minutes. Don't over-bake so as not to dry it too much.
- Leave to cool completely before cutting.
- Divide into 16 squares.

Around 75 calorie per square.

Healthy Pesto Sauce

I've come to learn that pesto sauce can go with so many recipes,  and that basil is a treasure of benefits. So I've developed this very simple, very healthy version for grilled/roasted vegetables, meat, chicken, tofu, you name it!
What's more is that you can prepare it in bulk and store it in clean air-tight jars for a seasoning in a jiffy. 


You need:

1 cup fresh basil

1 garlic clove


2 tsp light feta cheese


2 tsp coconut/olive oil


Salt & pepper to taste


Pulse all ingredients in a food processor till creamy and vivid green. Store in a glass jar.


Healthy Pesto

Mini Madness- Tuna Kofta/ Mini-burger

I'm in love with mini-anything at the moment, so here's another mini burger recipe. 


Tuna kofta / mini burgers
Tuna Mini-burgers


You need: 


-1 can of tuna (in brine only)

-1 medium carrot,grated. 
-1 small onion, grated and well-strained of its liquid. 
-1 garlic clove, smashed/1 tsp garlic powder 
-1 egg (or more oats/bread crumbs for an eggless version)
-3 tbs oats/wholewheat bread crumbs (I make my own) 
-Fresh parsley and coriander, chopped 
-Salt, pepper, oregano, paprika, ginger, all-spice to taste
-1 tsp coconut/olive oil for grilling 


-Mix all ingredients together by hand till well-combined 
-Form into small patties. Mine were a tad smaller than mini burgers. Makes 10-11 patties. 
-Sparsely brush a non-stick skillet with oil, heat it, then start cooking burgers, 5 at a time. Sear them for 3 min on both sides till golden brown and well-done. -Enjoy! 

Veggie Goodness: Healthy Cauliflower Carrot Mini-burgers

Clean cauliflower and carrot burgers: 

-About half a cauli divided and boil-cooked in salted and generously cumin-ed water till soft. 

- 1 big carrot, peeled and grated. 
- 2 Tbs whole-grain bread crumbs 
- 1 egg, beaten ( use more bread crumbs or oats if you're vegan/vegetarian) 
- Salt, pepper, paprika, cumin, oregano, ginger to taste 
- Parsley/coriander (optional) 

● Put the cooked cauli in a strainer. Using a masher, smash the florettes down, squeezing any excess liquid out as you do. 

● Add the grated carrots, egg, crumbs, spices and mix well with your hand until the mixture is sticky and doughy. If you feel it's too dry, add another. It depends on the size of the eggs. 
● Form the dough into mini-burger patties and you can either bake them in a preheated 180 degree oven or grill them on a sparingly-greased non-stick skillet for 3 min.on each side. 
● If in the oven, make sure you use lightly greased parchment paper or a non-stick baking tray, top and bottom-heated oven, until golden brown. Don't forget to tag me if you make them. 
Veggie Mini-burgers

Hello world!

Hey everybody,

I've recently lost 22 kg (About 45 lbs) since I started a lifestyle change in April 2013. I've just hit the below-100 kg mark, and I'm super thrilled. To celebrate, I decided to launch a blog to compile all the healthy recipes, home workouts and daily endeavors which I've only recorded on Instagram. (@sarahshalaby1)
You'd also find occasional posts about makeup, cosmetic reviews, and some about Lily, my 19-month baby girl. It's just basically a piece of me.

So thank you for stopping by and keeping an eye on my little excerpt of life. See you in future posts.

xoxo